Crispy Lotus Stem is an Asian-style side dish made with lotus roots. Load it with your favourite vegetables, and you are all set for a delicious stir-fried side dish. Be sure to watch the video!
About Lotus Stem
Lotus Root is a plant-based, vegan and gluten-free ingredient. It is widely used in Indian, Chinese, Korean, and Japanese style cooking.
In Hindi, it is known as kamal kakdi, which translates to lotus stem or lotus roots. In India, we make a delicious vegetarian curry with lotus stems.
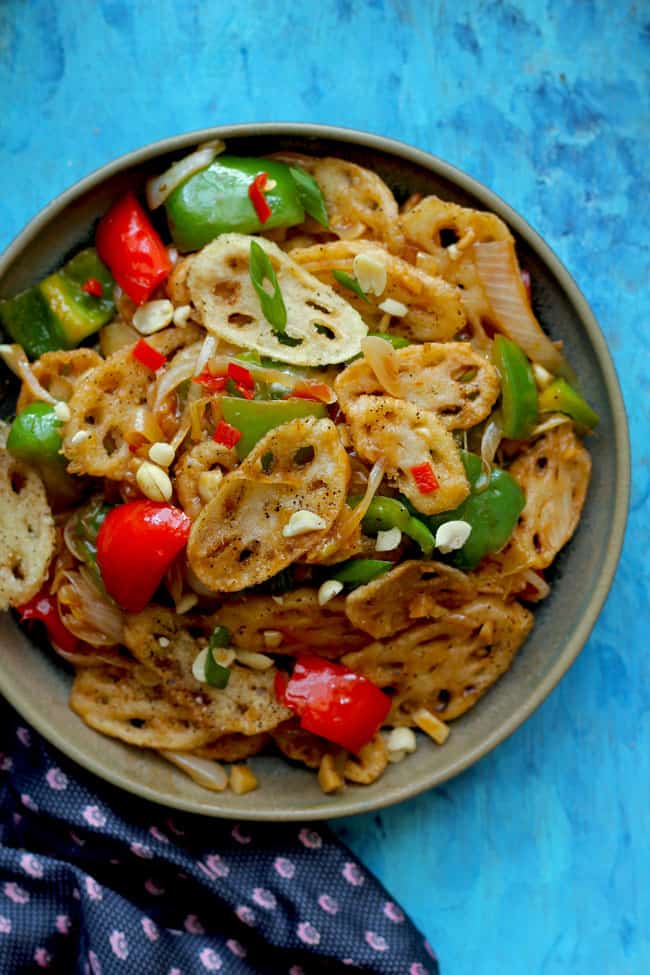
Crispy Lotus Stem is a popular pan-Asian delicacy. The thinly sliced, tender lotus roots are stir-fried with garlic, ginger, and vegetables in a sweet, spicy sauce. It is a crispy, saucy, and tasty vegan dish, that you are surely going to love.
Is it essential to deep-fry the lotus stem?
Absolutely not! You can bake them in the oven at 180 degrees Celcius until the lotus stem turns crisp and crunchy. Or if you have the luxury of an air-fryer, nothing like it. Air Fry the lotus stem slices at 170 degrees Celcius for 20 minutes.
I want to share one more secret about this quick lotus stem stir fry. You can make it saucier. How?
Once you deep-fry the lotus stem, do not discard the leftover cornstarch mixture in the bowl. Add approximately ⅓ cup of water to it and make a smooth paste. Pour this liquid into the stir fry after adding the sauces and stir to combine. Allow it to simmer before adding the lotus stem.
You will get a thick, saucy liquid to enjoy with the crispy lotus stem stir fry.
Watch Crispy Lotus Stem Video
Serving Suggestion
Crispy Lotus Stem is mainly served as a side dish or a snack to accompany a main-course dish, such as garlic noodles, fried rice, or vegetable Manchurian. If you make it slightly saucy, then serve it with plain rice.
Bright and colourful, this crispy lotus root stir fry is simple to make. I have already made it twice this week. And still not getting over it.
More Indian Chinese Recipes
Subscribe to our weekly newsletter or follow us on Youtube for video recipes.
If you try this recipe and love it, please leave a comment and a rating. This helps us grow and reach other food lovers like you.

Crispy Lotus Stem Recipe
Ingredients
- 2 medium-size tender lotus roots (kamal kakdi)
- 1 onion, fine chopped
- 1 red bell pepper, diced
- 1 capsicum, diced
- 1 teaspoon chopped garlic
- 1 teaspoon chopped ginger
- 1 small red chilli, chopped
- 1 teaspoon soy sauce
- 1 teaspoon red chilli sauce
- 1 teaspoon tomato sauce
- Oil for deep-frying
- Salt and pepper to taste
Ingredients for Marinate
- ¼ Cup cornflour (cornstarch)
- 1 tablespoon maida (all-purpose flour)
- Salt to taste
- ½ teaspoon black pepper
Ingredients to Garnish
- 1 tablespoon chopped spring onion greens
- 1 tablespoon crushed peanuts
Instructions
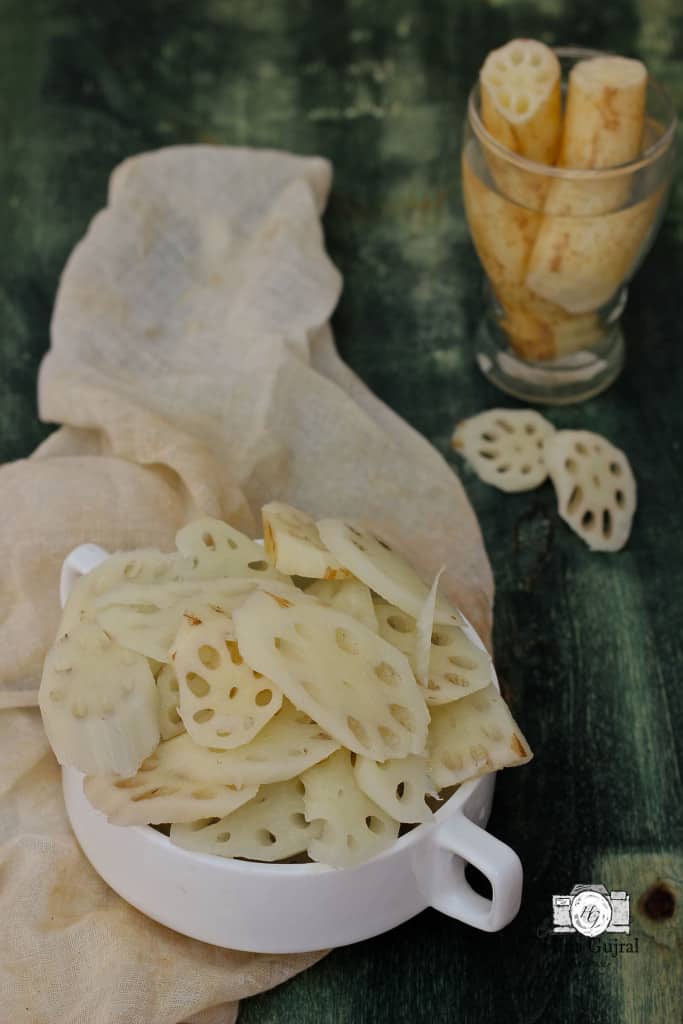
- Peel and slice the lotus stem into thin slices. Soak the lotus stem slices in water with a little bit of salt for 5 minutes. This step ensures that all the mud and dirt are removed from the lotus stem.
- Drain the water and spread the lotus stem slices on a kitchen towel. Allow them to dry. If required pat dry with another kitchen towel.
- In a bowl combine lotus stem slices, corn starch, salt and pepper. Mix nicely.
- Heat oil in a frying pan to deep fry the lotus stem slices.
- Deep-fry the lotus stem slices in small batches until they turn crisp from both the sides. Transfer to a plate/colander and set aside.
- Heat one tablespoon of oil in a wok/frying – pan.
- Add ginger, garlic, and red chilli. Stir fry for less than a minute. Add sliced onion and again cook for few seconds or till onion turn soft.
- Add the bell pepper and capsicum. Stir fry them for a minute.
- Now add the vinegar, sauces, salt, and pepper. Combine nicely.
- Next add the fried lotus stem slices. Mix nicely to coat lotus stem with the sauces.Turn off the heat.
- Serve Crispy Lotus Stem Stir Fry garnished with spring onion greens and crushed peanuts.
Recipe Notes:
- Make sure to use fresh, and tender lotus root to make stir fry.
- Keep an eye on lotus root while frying as they burn very fast and taste bitter.
- Do not fry lotus root for too long as it might turn tough in texture.
Nutrition

Sean Mahan says
Wow, this looks so delicious!! I’m already saving the recipe here so I can try it this weekend. Thanks!
Hina Gujral says
So happy that you liked it. Please let us know how it turned out.
KissAnime says
I assure this would be beneficial for most of the people
kennynguyen says
i know my comment wont reach but im still put it here because i really like this post thanks for posting this man
Hina Gujral says
I am glad you liked it. Thanks for sharing your feedback.
helix jump says
This is such a fun list! Love giving unique gifts to celebrate different holidays!
Stickman Hook says
This is a great thing, I think everyone feels this information is very valuable, thank you.