
If you are looking for a breakfast that delivers satisfying and comforting taste while packing a nutritional punch, Ragi Adai is the answer.
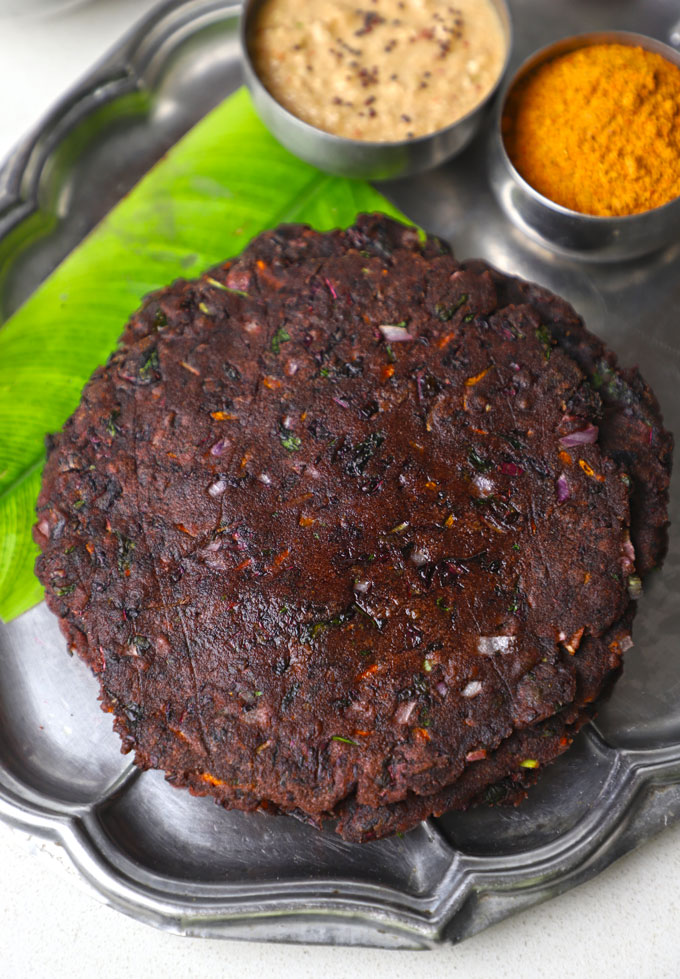
Ragi (finger millet) has long been a staple superfood in South Indian households. Earthy, rich in calcium, and packed with complex carbohydrates, it keeps your energy steady for hours. But plain ragi roti can sometimes tastes boring. The trick? Loading the dough with colour vegetables for taste and texture!
By folding in juicy grated sweet carrots, crunchy onions, and fresh leafy greens, you create an ragi adai that is crisp on the outside, incredibly soft on the inside, and bursting with vibrant flavour in every bite.
Why You’ll Love This Recipe
- Gluten-Free & Diabetic-Friendly: High in dietary fiber with a low glycemic index.
- Naturally Vegan and Filling: It has no dairy and keeps you full till lunchtime.
- Meal-Prep Friendly: The dough comes together in under 15 minutes with no fermenting. or complex process required.
Ingredients You’ll Need
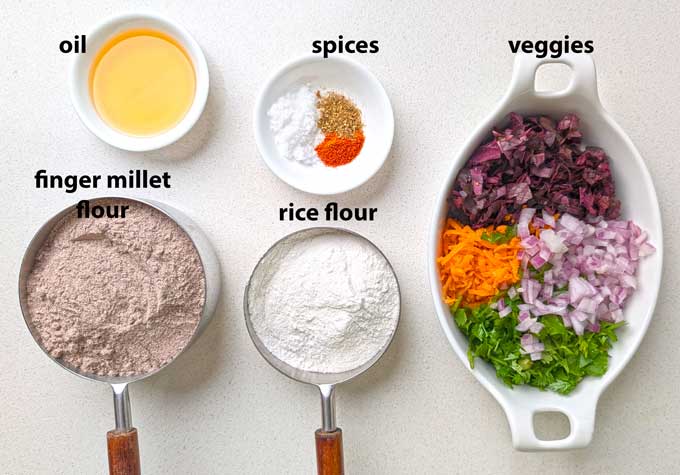
- Ragi or Finger Millet Flour, finely milled. You can subsitute it with jowar (sorghum) flour also and make thalipeeth.
- Rice Flour prevents cracks and makes the adai extra crispy.
- Vegetables peeled and finely grated like zucchini, bottle gourd, carrot, cucumber, ashgourd, and so on.
- Fresh Greens like drumstick (moringa) leaves, finely chopped spinach, spring onion, red amaranth, or fenugreek leaves are perfect to add to the dough.
- Seasoning: Green Chilli, Curry Leaves, Cumin Powder, Asafoetida (hing), Salt
- Sesame Oil to cook the adai.
How To Make Adai
1. Mix the Ragi Dough:
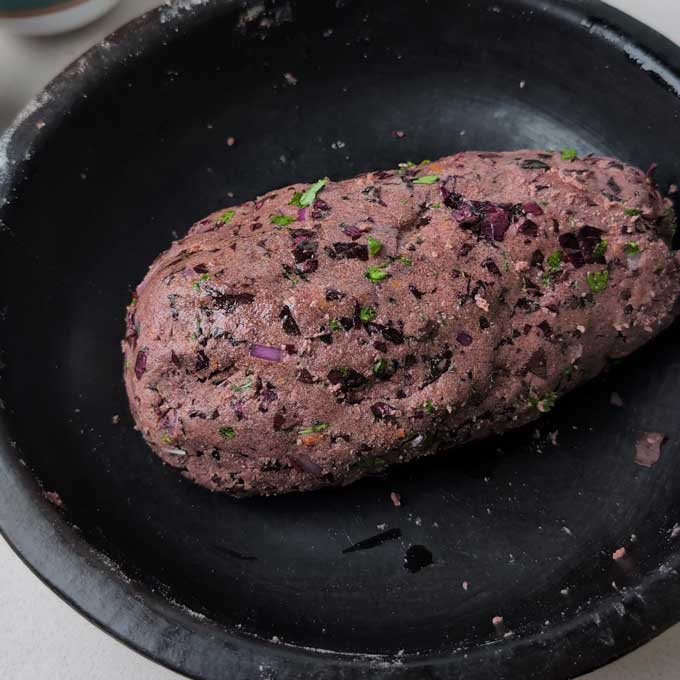
Aim for a soft, pliable, non-sticky dough.
- Add the ragi flour, rice flour, cumin powder, asafetida, and chopped cilantro to the bowl with the vegetables. Mix thoroughly using your hands so the vegetables are evenly coated with flour.
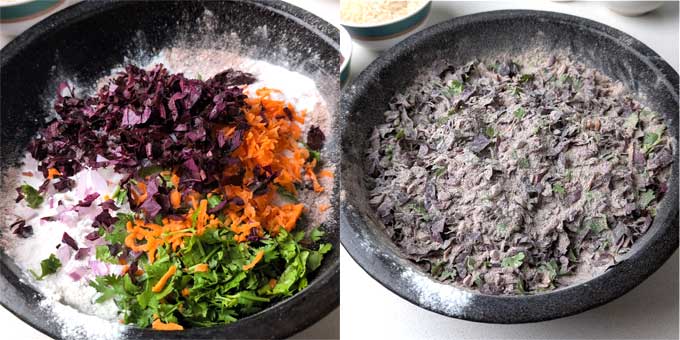
- Gradually sprinkle hot water—a few tablespoons at a time—and knead until you form a soft, pliable dough. It should be soft enough to pat out easily without cracking at the edges.
- Cover the dough with a muslin cloth and let it rest for 5 – 10 minutes.
2. Shape the Adai:
Use parchment paper, a banana leaf, or a wet cloth.
- Divide the dough into 4–5 equal-sized balls.
- Place a sheet of parchment paper or a greased banana leaf on your work surface.
- Grease your fingertips with a little water or oil, place a dough ball in the center, and gently pat it out with your fingers into a thin, round disc (about ¼ inch thick).
- Make 2 – 3 tiny holes in the center of the adai—this helps the heat distribute evenly and cooks the center perfectly.
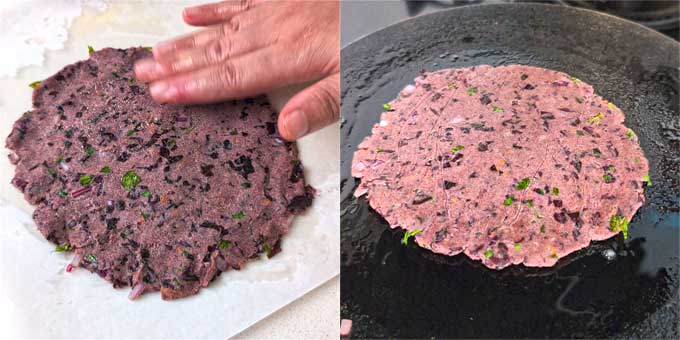
4. Cook on the Tawa:
Cook low and slow for maximum crispness.
- Heat a cast-iron tawa or skillet over medium flame and drizzle a few drops of sesame oil or ghee.
- Carefully transfer the flattened adai onto the hot tawa (peeling away the paper/leaf).
- Drizzle a few drops of oil around the edges and into the center holes. Cook on medium flame for 2 – 3 minutes until the underside turns dark brown and crisp.
- Sear both sides until fragrant. Transfer to a serving plate and repeat with the remaining dough.
Watch Adai Video
Serving Suggestion
Serve your hot and crispy Ragi Adai straight off the tawa alongside:
- Spicy Tomato-Garlic Chutney for a bold kick.
- Fresh Coconut Chutney to balance the spices.
- A side of refreshing raita or a bowl of masala curd.
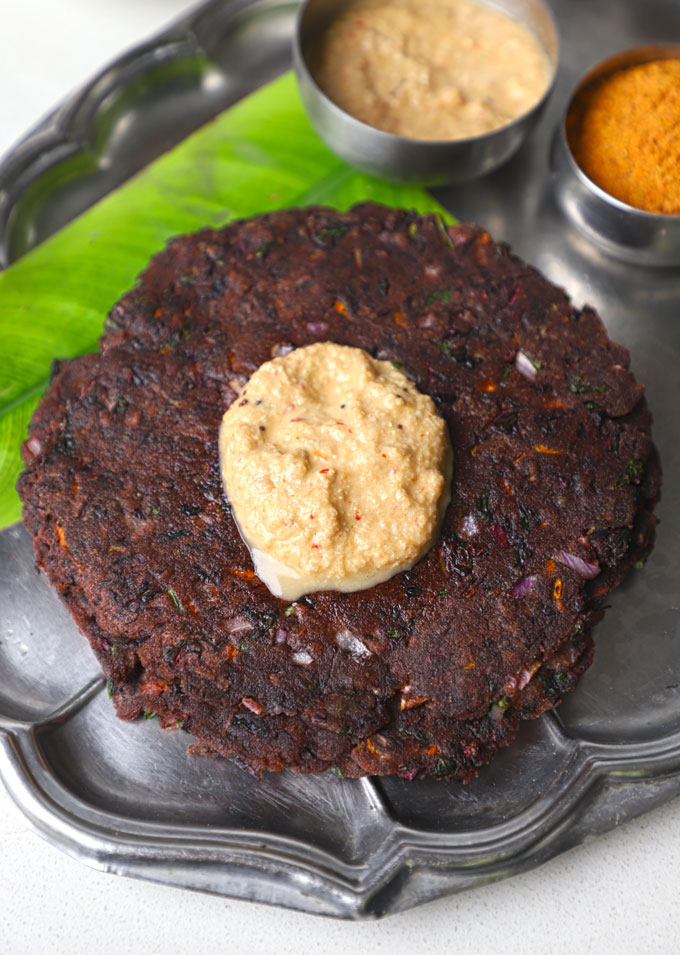
Looking for more intersting ways to eat Ragi? Then try Ragi Vermicelli Upma, Ragi Roti for everyday meals, fermented Ragi Kanji, or the Ragi Idli Dosa Batter.
follow us on Youtube and Instagram for video recipes.
Ragi Adai Recipe
- Tawa/Griddle
Ingredients
- 1 Cup Ragi Flour (finger millet flour)
- ¼ Cup rice flour (chawal ka atta)
- 1 Cup hot water
- 1 Cup chopped red amaranth leaves (lal chaulai)
- 1 medium carrot, grated
- 1 small onion, finely chopped
- handful of fresh coriander leaves, chopped
- 1 teaspoon cumin powder (jeera powder)
- ½ teaspoon salt or to taste
- ¼ teaspoon red chilli powder
- sesame oil to cook the adai
Instructions
- Add the ragi flour, rice flour, cumin powder, asafetida, and chopped cilantro to the bowl with the vegetables. Mix thoroughly using your hands so the vegetables are evenly coated with flour.1 Cup Ragi Flour (finger millet flour), 1 Cup chopped red amaranth leaves (lal chaulai), 1 medium carrot, grated, 1 small onion, finely chopped, 1 teaspoon cumin powder (jeera powder), ½ teaspoon salt or to taste, ¼ teaspoon red chilli powder, handful of fresh coriander leaves, chopped
- Gradually sprinkle hot water—a few tablespoons at a time—and knead until you form a soft, pliable dough. It should be soft enough to pat out easily without cracking at the edges.1 Cup hot water
- Cover the dough with a muslin cloth and let it rest for 5 – 10 minutes.
- Place a sheet of parchment paper or a greased banana leaf on your work surface. Divide the dough into 5 to 6 equal-sized balls.
- Grease your fingertips with a little water or oil, place a dough ball in the center, and gently pat it out with your fingers into a thin, round disc (about ¼ inch thick).
- Make 2 – 3 tiny holes in the center of the adai—this helps the heat distribute evenly and cooks the center perfectly.
- Heat a cast-iron tawa or skillet over medium flame and drizzle a few drops of sesame oil or ghee. Carefully transfer the flattened adai onto the hot tawa (peeling away the paper/leaf).sesame oil to cook the adai
- Drizzle a few drops of oil around the edges and into the center holes. Cook on medium flame for 2 – 3 minutes until the underside turns dark brown and crisp.
- Sear both sides until fragrant. Transfer to a serving plate and repeat with the remaining dough.
- Serve hot and crispy Ragi Adai straight off the tawa with chutney of choice.
Recipe Notes:
- Ragi takes slightly longer to cook thoroughly than rice or wheat batter. Keep the heat on medium—cooking on high heat will scorch the outside, cracked edges while leaving the inside doughy.
- Do not use cold or room temperature water to bind adai dough. Hot water is ideal for binding flour without gluten.
- While cooking, do not flip the adai again and again like regular paratha. Be patient, once it is nicely cooked from one side, flip and cook from the other.


Leave Your Rating & Comment